![Yoga Poses for Open Hips and Shoulders Using Blocks and Straps [TUTORIAL]](https://www.schimiggy.com/wp-content/uploads/2019/01/Yoga-Poses-for-Open-Hips-and-Shoulders-Using-Blocks-and-Straps-schimiggy-reviews.jpg)
![Yoga Poses for Open Hips and Shoulders Using Blocks and Straps [TUTORIAL]](https://www.schimiggy.com/wp-content/uploads/2019/01/Yoga-Poses-for-Open-Hips-and-Shoulders-Using-Blocks-and-Straps-schimiggy-reviews.jpg.webp)
Yoga Poses for Open Hips and Shoulders Using Blocks and Straps
The shoulders and hips are some of our fussiest joints and it’s important to take care of them from the start. By adopting gentle exercises to open up your joints, this will hopefully prevent you from getting injured and learning from an injury instead of the other way around. These exercises will also prepare you for more advanced poses.
I remember going to heated yoga 6-7 days a week and sometimes even twice in a day. The heat felt good because the heat made my body more limber and open. I then learned the hard way that heat can be damaging to my body. One day my knees became inflamed with arthritis, which led to a temporary hiatus from heated yoga and eventual cessation from any form of hot yoga. I now avoid heated exercises because I know the damage it can do to both flexible and non-flexible practitioners.
If you’re on the same boat as me and need additional TLC to open up your joints, here are some poses you can adopt at home or in the yoga studio.
What Props You Need:
Yoga Poses for Open Hips
Supported Crescent Lunge/Anjaneyasana
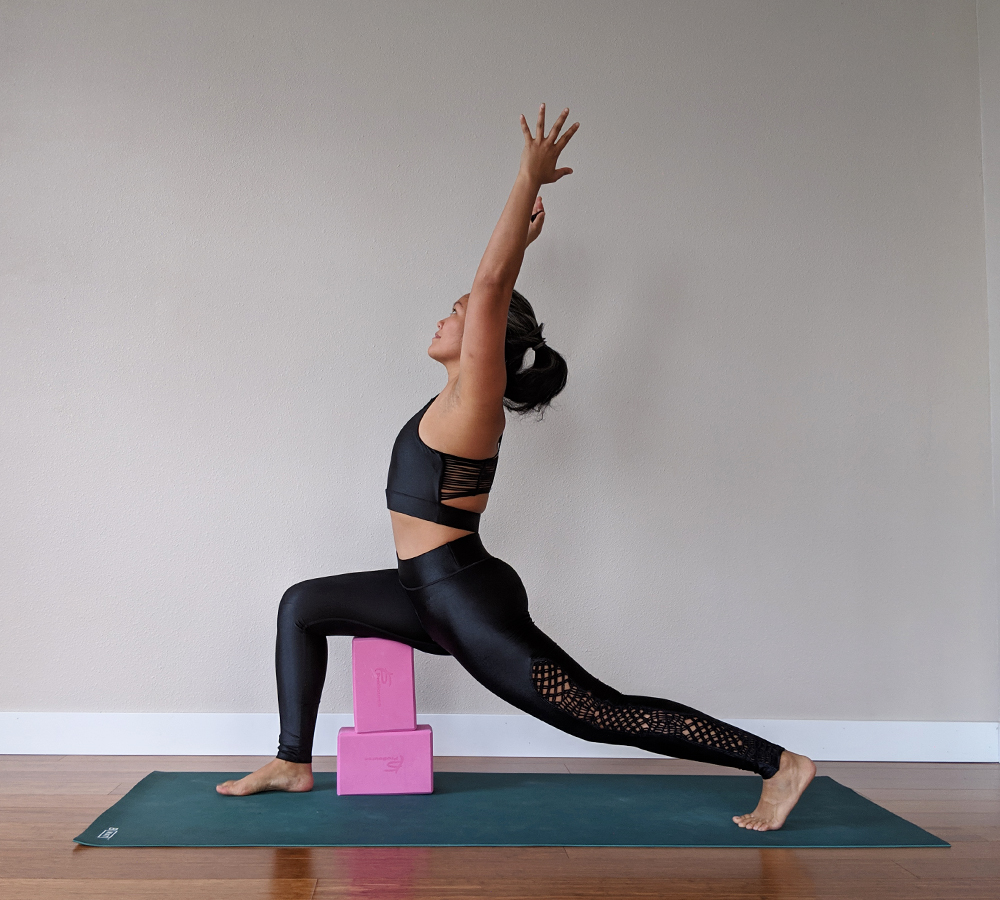
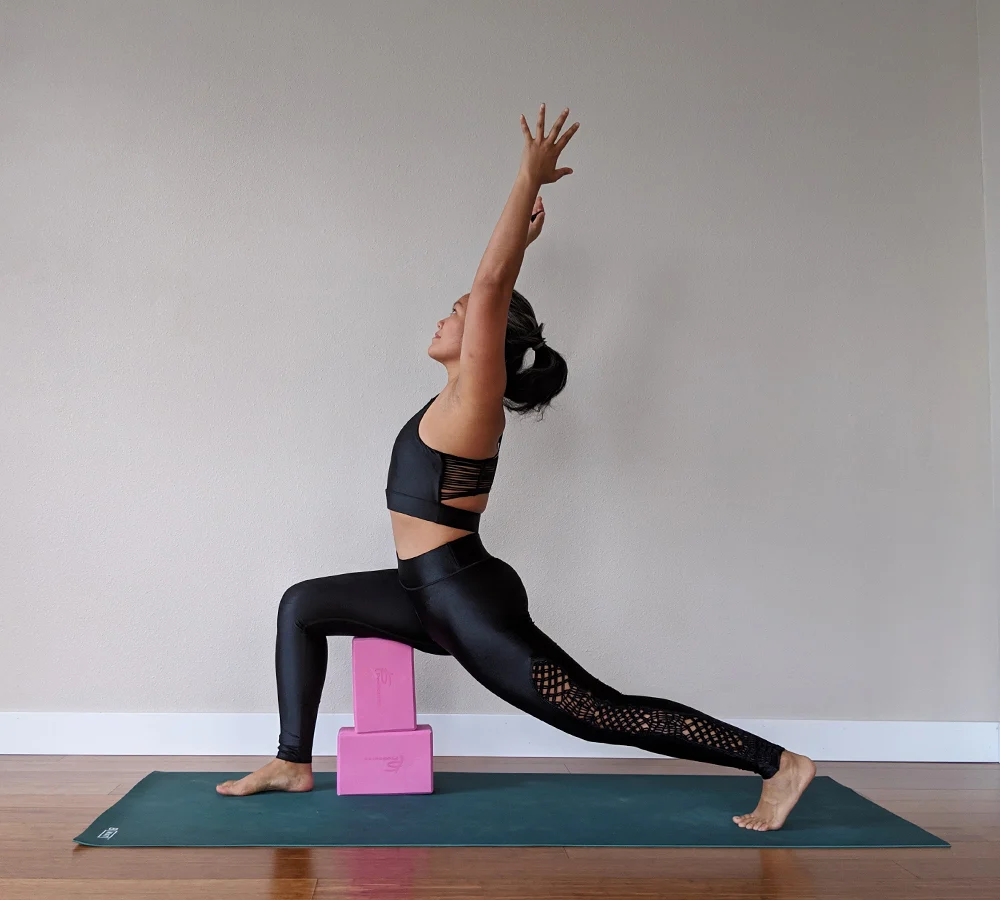
Crescent Lunge or Anjaneyasana is great for opening up and strengthening the hips while working on a strong steady balance. This pose can be done without blocks. Use the blocks for added knee support, getting deeper into the pose, and to stabilize the pose.
How to Get Into Crescent Lunge/Anjaneyasana
- Grab two blocks and stack them into an inverted T-shape (see above). Place them near the top on the right half side of your mat. Your thigh will land on top of the blocks.
- Start with both feet parallel at the top of your mat and your hands on your hips.
- Step back with your left leg as far as you can. You may need to lean your torso forward for counterbalance. Your right knee will bend a lot, drawing the thigh closer to the blocks.
- Land the back of your right thigh on the blocks and begin to wiggle your left toes further back until the leg straightens. Your back knee can also be bent if it is more comfortable.
- Keep your hands on the hips and start to sit low with the assistance of the blocks. You should feel your psoas (muscle connecting spine and hips) and left hip flexor (front of the hip) start to deeply stretch.
- You can keep your hands on your hips or begin to reach them up to toward the sky, or toward the back for a backbend.
- Take your eyes to one point in the room (drishti) and hold it here for 7-10 deep breaths.
- Bring hands back to the hips and step both feet to the top of the mat again. Move the blocks and repeat the same on the opposite side.
Standing Forward Fold/Uttanasana
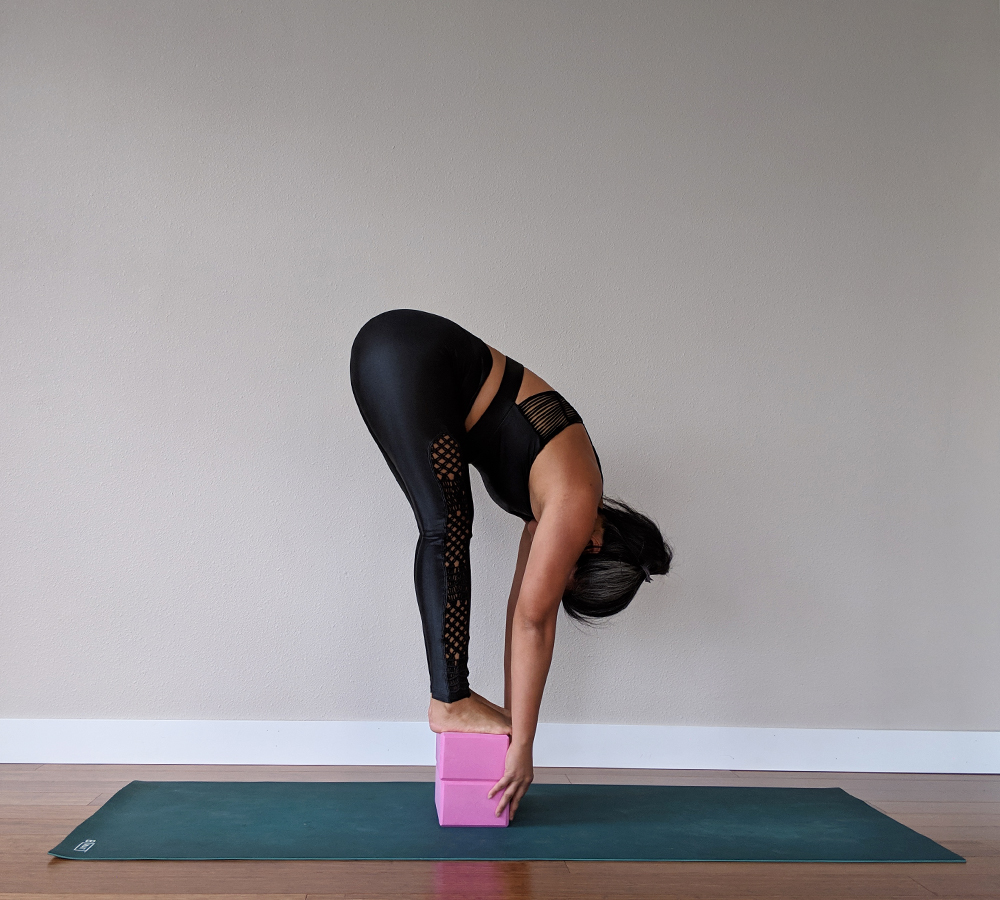
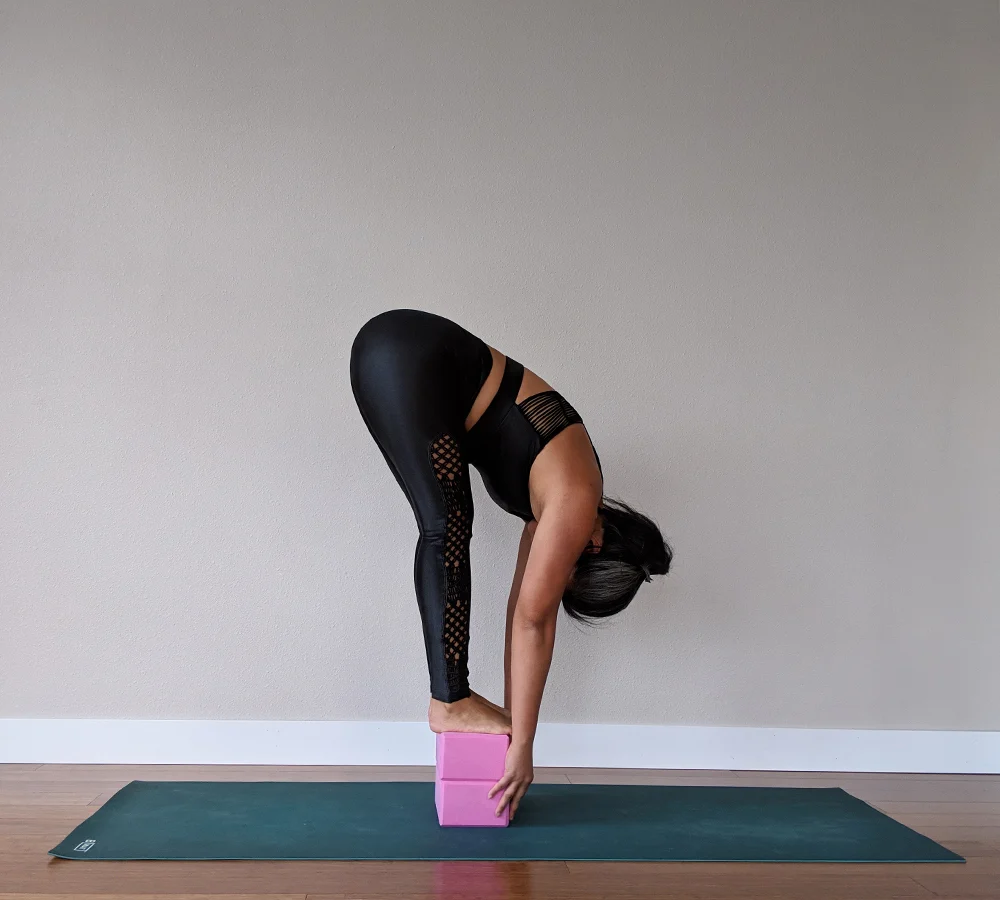
Standing Forward Fold or Uttanasana is a great pose for opening the back of the hips and getting blood flowing into the torso and head to prepare for inversions. Use the blocks for an added stretch in the back of the legs and to practice balancing.
How to Get Into Standing Forward Fold/Uttanasana:
- Stack the blocks horizontally in the middle of your mat.
- Stepping up one foot at a time, stand on top of your blocks. Toes will be touching and heels will be 1″ apart.
- Start with hands on your hips for balance, then slowly start to release the hands from hips and roll your spine down with the crown of the head reaching towards the ground.
- Start to bring weight into the middle or your feet or even toes to distribute your balance forward.
- Your fingers can reach for the bottom of the blocks or the floor. Your hands can also be placed on top of your shins.
- As you breathe in, imagine you’re creating space between each vertebra, and as you exhale, imagine you’re lengthening the spine towards the Earth.
- Hold this pose and breath for 10 deep breaths.
- To come out, bring hands to shins and begin to draw weight back into your heels. Start to curl the spine up until the crown of the head is all the way up and you’re standing on top the blocks again.
- Step one foot at a time down from the blocks to dismount.
Frontal Splits/Hanumanasana
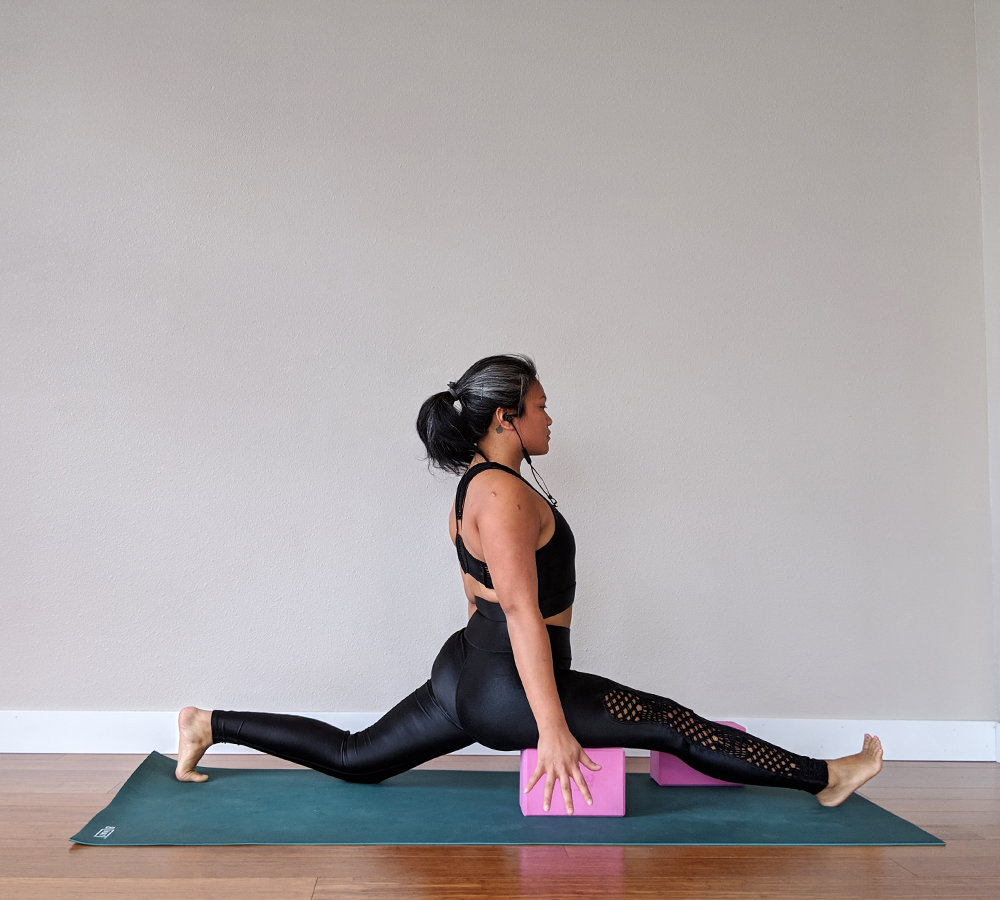
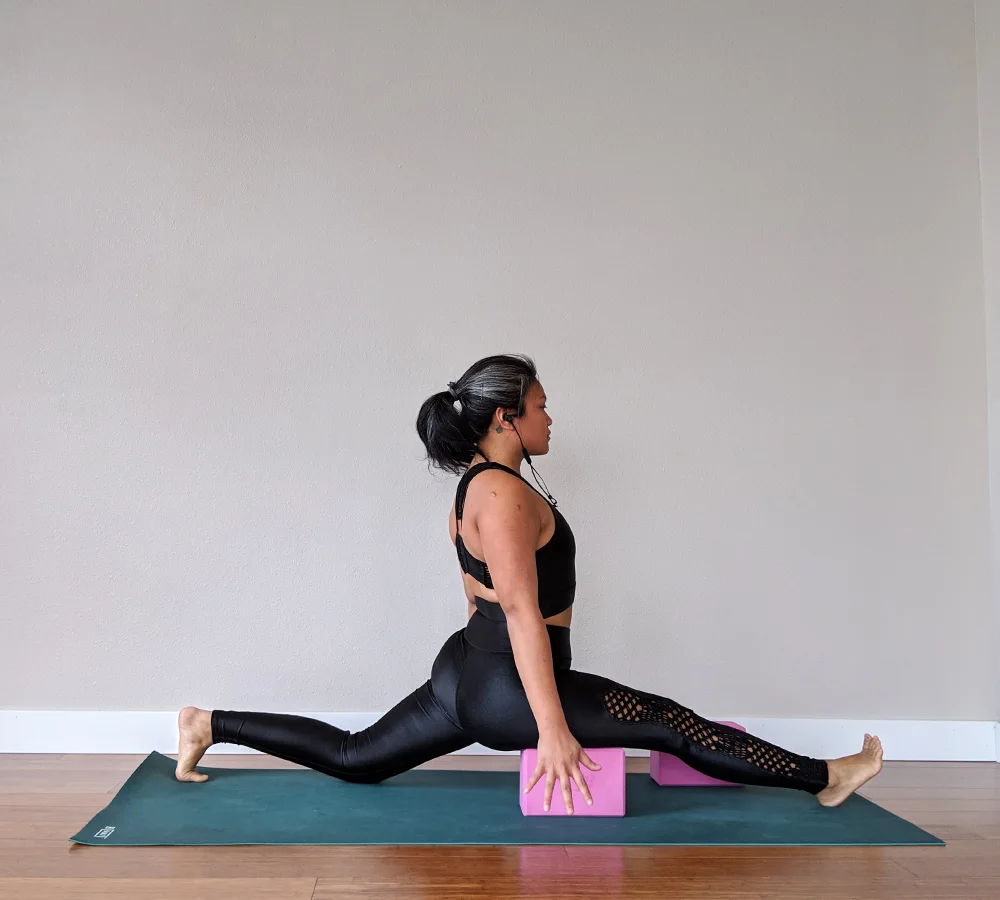
Frontal Split,s or Hanumanasana, is a great way to open your hips deeply. This pose requires patience, so blocks are a great way to learn how to get into this pose. If you feel any discomfort, please modify or take a step back from this pose. It is an advanced pose that requires open hips.
How to Get Into Frontal Splits/Hanumanasana:
- Start in table top position with one block on each side of your mat.
- Swing your right leg forward and begin to lengthen it towards the front of your mat. Wiggle your heel forward until the ball of the foot is over the heel of the foot.
- Bring the blocks into your hands and draw your heart toward your toes. You can stay here in half hanuman or half splits for 10 to 15 breaths then switch sides.
- If you want to go a little further, begin to lengthen your back leg towards the back. Bring a block underneath the front thigh as you get deeper. This helps to keep the hips elevated so that you can slowly extend the legs in opposite directions to get into frontal splits.
- Eventually, you can remove the block and land your glutes onto the ground.
- Once you’ve found your variation and depth, stay here for 10 to 15 breaths.
- To come out, bring your hands onto either side of your front thigh and begin to press your arms until your hips lift off the ground. Draw the inner thighs together to come into half splits, then swing the front leg back and rest in childs pose/balasana for 5 breaths.
- Repeat on the opposite side.
Pyramid Pose/Parsvottanasana into Triangle/Trikonasana and Revolved Triangle Pose/Parivrtta Trikonasana
Pyramid Pose/Parsvottanasana into Triangle/Trikonasana and Revolved Triangle Pose/Parivrtta Trikonasana are some of my most favorite poses for hip opening. You also get to work on your core while getting an intense stretch in the low back, hips, glutes, and back of the legs.
Yoga Poses for Open Shoulders
Seated Shoulder Opener

I use this seated shoulder opener to prepare for gomukasana or cow face pose. It’s also a great stretch to do anytime your shoulders and chest feel tight.
How to Do Seated Shoulder Opener:
- Come into a cross-legged seat with a block underneath your hips. This helps to elevate the hips and prevent discomfort in your hip and knee joints.
- Hold onto the metal D-ring end of the strap and bring the strap into your right hand with your arm extended in front of you.
- Use the left hand to grab the D-rings and draw the strap towards your right shoulder. This should create an arm length strap in between both hands.
- Holding the strap horizontally in front of you, begin to draw the strap up, overhead and then behind you in a circular motion. You should feel your shoulders opening up. If your arms get stuck, try making the strap a little longer.
- Rotate your arms back and forth 8 to 12 times.
- Once you’re done, bring the strap back to the front of you and release it. Be here a few breaths and notice how your shoulders and chest feel. They should feel open and a little tender.
Crow Pose/Bakasana
Crow pose is a great way to work on balance, core and arm strength. This requires the engagement of a lot of parts of your body simultaneously. Luckily we can use blocks to get into the pose.
How to Get Into Crow Pose/Bakasana:
- Bring two blocks to the top of your mat and place them the tallest height and shoulder width apart. There should be enough space between the blocks for your head to fit.
- In tabletop position, bring your middle finger to the base of the block closest to your body. Flatten your hands against the floor and press your fingertips into the ground to activate the hands.
- Tuck your toes and begin to walk forward while keeping the hands and palms flat on the ground.
- Place your shoulders onto the top of the block. You will feel like you’re leaning forward, but don’t worry. The blocks will prevent you from rolling forward.
- Once shoulders are on top of blocks, take your gaze towards the top of the mat/front of the room and keep it there. Looking back will cause the top of your head to hit the ground, so always look forward!
- This next part may be a little tricky. Try it out anyway. Begin to bring one knee at a time to the top of your triceps. You can also use your core and do a little hop to bring both knees to the triceps at the same time.
- At this point, you’re doing crow with the blocks! Use your core to keep the knees and triceps connected.
- To advance a little further, start to press into your fingertips to really engage your forearms, triceps, and biceps. Then lift your shoulders just an inch off your blocks. Work on balancing here. You will need to use your fingertips to control the back and forth movement in crow pose.
- Stay in crow pose for 8 to 10 breaths.
- To dismount, you can shoot your legs back and come into chaturanga OR slowly press into your fingertips to lower the feet back to the ground and shoulders will come off of the blocks.
Final Thoughts

 Keep in mind that you NEVER want to force your joints to open. If your body starts to feel uncomfortable or in pain, back off and ask the instructor for a modification. Forcing our bodies into poses that feel uncomfortable can lead to injury. Using props is a great way to prevent injury while working towards simple to advanced poses. Always have them on hand during practice. It’s also best to have your own set so that you can practice anytime and know when you need to clean and sanitize your props.
The blocks and straps were provided by ProsourceFit. You can buy all your yoga equipment here and use code SCHIMIGGY for 10% off your orders!
Thank you for visiting today! If you found this encouraging or informative, please connect with us on Instagram or TikTok. Sign up for our monthly newsletter for updates and more. We promise we won't spam you! Feel free to unsubscribe anytime. If you're a brand and want to work with us, please visit this page to get in touch.

Jaclyn
Thursday 31st of January 2019
I certainly should do more yoga! These poses are amazing
munch
Friday 27th of November 2020
Great post https://footballmonk.in/product-category/buy-football-jersey-india/